Symbols
Symbols are the core building blocks of a TinyCAD schematic. You place symbols from libraries, set their attributes, then wire their pins to build an electrically valid design.
You can use your own Symbols or download symbols directly from the TinyCAD.net web-site.
See also:
Find and place symbols
- Type the name of the symbol you want in the search box
- Select the symbols to see them, and pick the one you want
- Drag the symbol from the preview in to you drawing
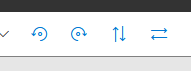
Orientation while placing
When placing a symbol, set orientation by using the rotate and flip buttons on the toolbar.
Editing and moving symbol text
After placement, you can move the entire symbol by dragging it.
You can also move symbol text fields (for example value/name/reference) independently by selecting the symbol and dragging each field to a better location.
You can edit the text by clicking on it.
Symbol attributes in a schematic
Placed symbols usually include these key attributes:
- Name/Value: what the part is (for example
10k,100nF, device type) - Reference: unique designator in the sheet/project (for example
R1,U3) - Package (optional): footprint/package identifier used in downstream export flows
Reference fields must remain unique. TinyCAD tools can help auto-generate or re-annotate references when needed.
You can add extra attributes for project metadata, PCB flow, or simulation metadata as required.
Related pages
- Wires
- Labels
- No Connects
- Back to Drawing
- Back to v4 contents