Your first drawing
This page will take you through the steps of drawing your first circuit diagram with TinyCAD.
At its simplest level, a TinyCAD drawing is a collection of symbols linked using wires. In this example, you will place some symbols and then join them up with wires.
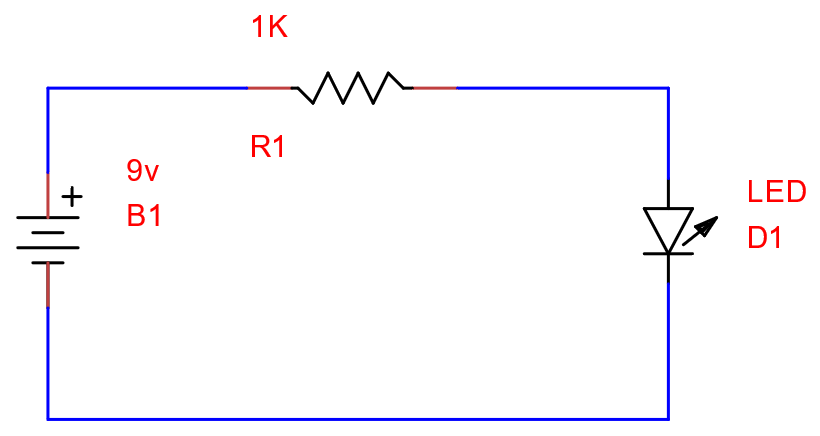
Example circuit
Here is a simple circuit to draw:
Video Walkthrough
Step by step guide
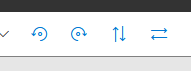
Symbol libraries
- Type
batteryin the search box. - Select Multi Cell Battery.
- Drag the symbol from the symbol panel onto the drawing.
Now place a resistor and an LED.
Use the toolbar rotate/flip controls to orient symbols:
If you make a mistake, use Undo/Redo:

Your drawing should look similar to:
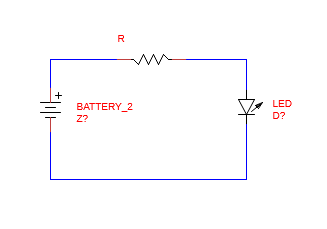
Wiring up a circuit
- Select the Wire tool.
- Click a battery terminal to start a wire.
- Move to the resistor terminal and click again to place the wire.
Wires snap to valid symbol connection points. A red circle indicates a snap location.
Tip: press W on the keyboard to re-enter wire mode quickly.
After wiring, it should look similar to:
Annotating the drawing
Symbols need component values and references. In TinyCAD these are typically the symbol Name and Ref fields.
- Click the battery.
- Go to the Symbol panel at the bottom.
- Change
BATTERY_2to9V. - Change reference
Z?toB1.
Repeat for the other parts:
- Resistor: Name
1K, RefR1 - LED: Name
Red Led, RefD1
If a name/reference is hidden, use the checkbox controls to show or hide text on the drawing.
Loading and saving
Browser Local Files
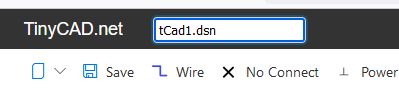
To save your drawing use the “Save As” or “Save” buttons on the toolbar:
Browser Google
Your first drawing is complete. To rename it:
- Click the drawing name at the top (for example
tCad1.dsn). - Rename it to
First Drawing.dsn. - Press Enter.
Save to Google Drive using the Save icon.
To load it again from Google Drive:
- Open https://drive.google.com/drive/.
- Find the drawing.
- Right-click and choose Open with -> TinyCAD.
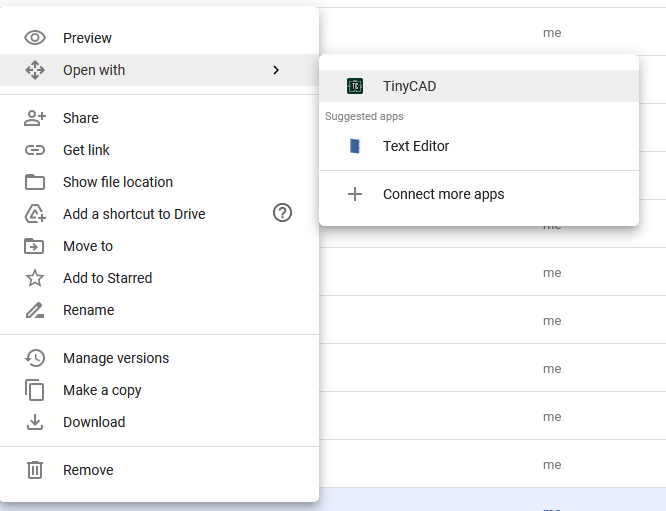
You can also rename and delete TinyCAD designs in Google Drive.
Desktop App
Your first drawing is complete. To save it from the desktop app:
- Open File -> Save As.
- Choose a folder on your computer.
- Save the drawing as
First Drawing.dsn.
To load it again later:
- Open File -> Open.
- Browse to
First Drawing.dsn. - Select the file and open it.
TinyCAD desktop uses the same .dsn format as TinyCAD in the browser. You can
download a drawing from Google Drive and open it in the desktop app.
Likewise, you can use drawings you have done on the Desktop version of TinyCAD with the Browser based version.
Further reading
For custom symbols and libraries, continue with Custom symbol libraries.
- Back to Drawing
- Back to v4 contents